
Building a home gym sounds simple until you start comparing racks, flooring, and “must have” accessories. The good news is you don’t need a huge budget or a spare warehouse. You need a clear goal, a realistic plan for your space, and a short list of equipment you will actually use. In this guide I’ll walk you through the steps I use when helping people set up a practical home training space, from choosing your training style to budgeting in phases. You’ll also get straightforward advice on avoiding common mistakes and keeping your setup flexible as you progress.
Start with your training goal (this decides everything)
If you skip this step, you’ll end up with a random collection of gear and no real training direction. When people ask me how to build an “ideal” home gym, my first question is always: what do you want to be good at in six months?
Pick your main training style
Your ideal homegym looks different if you’re chasing a bigger squat versus cleaner pull ups. Most home gyms work best when they support one main focus and a couple of secondary goals.
- Strength and muscle: you’ll want progressive loading, stable pressing options, and enough weight to keep improving.
- Calisthenics skill: prioritize pull up options, rings, and a clear space for handstands and core work.
- Fat loss and conditioning: you need tools that make hard work easy to start, like jump rope, bands, or a simple cardio machine.
- General fitness: choose versatile basics that cover push, pull, legs, and core with minimal clutter.
My honest take: if you’re a beginner or early intermediate, build around movements you can repeat for years. Fancy machines feel motivating for two weeks. Consistent basics still work a year later.
Use the “movement checklist” to avoid blind spots
Before buying anything, make sure your plan can train these patterns:
- Squat or knee dominant legs
- Hip hinge
- Vertical pull
- Horizontal push
- Core and carries
If your planned setup can’t cover at least four out of five, it’s not ideal yet, it’s incomplete.
Measure your space like you actually live there
Space is the real budget in a home gym. You can train well in a small room, but only if you respect clearances and don’t block daily life. A common mistake is planning for equipment footprints and forgetting the space your body and the weights need while moving.
Minimum usable space (and what fits)
Here’s a practical rule that matches what I see work in real homes:
- Small room: about 3 m x 3 m can work for dumbbells, a bench, a pull up setup, and bands.
- Garage sweet spot: roughly 150 to 250 sq ft gives you room for a rack plus storage and a small platform.
- Ceiling height: aim for enough clearance for overhead pressing and pull ups without scraping knuckles on the ceiling.
If you’re tight on space, the “ideal” setup is usually the one that packs away quickly. Wall mounted or foldable options can be great if you genuinely fold them away.
Clearances that prevent annoying problems
These are the small details that stop your home gym from becoming frustrating:
- Leave about 1 meter of clearance around your main training area if possible.
- Plan where plates, dumbbells, and bands will live so they don’t end up on the floor.
- Think about doors, windows, and heating units before placing a rack or pull up bar.
- Check noise: deadlifts on bare concrete travel through the whole house.
One more human detail: if your gym blocks laundry, parking, or your partner’s storage, it won’t last. “Ideal” includes being sustainable in your household.
Budget in phases so you don’t buy twice
The fastest way to waste money is trying to build the finished gym on day one. The smarter approach is building a fully usable gym first, then adding targeted upgrades once you know what you enjoy.
Phase 1: essentials you’ll use every week
Phase 1 should give you full body training with minimal gear. For many people, that means adjustable dumbbells, a bench or floor pressing option, a pull up solution, and basic bands. If barbell training is your priority, this is also where a rack and plates enter the picture.
Practical pricing ranges (rough 2026 reality) often look like this:
- Starter: €300 to €800 for dumbbells, bench, bands, and flooring basics.
- Advanced: €1,500 to €4,000 when you add a rack, barbell, and plates.
- Elite: €5,000+ when you start adding machines, specialty bars, and full room flooring.
My opinion: spend your money on what touches your training quality daily: stability, safety, and ease of progression. Everything else is optional.
Phase 2: versatility, comfort, and variety
Once you’ve trained consistently for a few months, you’ll notice what’s missing. Phase 2 is where you add variety without losing the simple feel of the gym.
- Extra resistance options like bands or rings
- Better storage so the gym stays tidy
- A small conditioning tool you’ll actually use
- Flooring upgrades if noise or grip is an issue
Phase 2 is also where second hand deals shine. Plates, dumbbells, and storage are often easy to buy used if you check for rust, cracks, and wobble.
Phase 3: the one “big ticket” item that matches your style
This might be a cable machine, a cardio machine, or a nicer rack with attachments. The key is waiting until you know your habits. If you mainly train calisthenics and weighted basics, a huge machine can become an expensive coat rack.
Home gym essentials: what to buy first (without overbuying)
Most SERP lists throw 20 items at you. I prefer a smaller list that covers the movement checklist and keeps your gym flexible.
The simplest effective starter kit
If you want a minimal setup that still feels like a real gym, this is a strong baseline:
- Adjustable dumbbells or a small fixed set
- Resistance bands for pulling, assistance, and warm ups
- A stable bench or a solid floor setup with a mat
- A pull up option (doorway, wall, or freestanding depending on your home)
- Basic accessories: collars if you use a bar, a timer, and a way to store gear
For calisthenics focused training, I like a setup that supports strict pull ups, rows, dips, and core. If you want a clear starting point, this beginner routine overview is worth saving: https://calisthenics-equipment.com/calisthenics-workout-for-beginners/.
When a rack actually makes sense
A rack can be a fantastic centerpiece, but only if you will use it. I’d consider it a smart buy if at least one is true:
- You squat or press with a barbell and want safer solo training
- You want a solid pull up bar and a place to attach accessories
- You’re progressing beyond what dumbbells comfortably load
If none of these apply, your ideal homegym might be better served by rings, a pull up bar, and dumbbells instead of a huge rack.
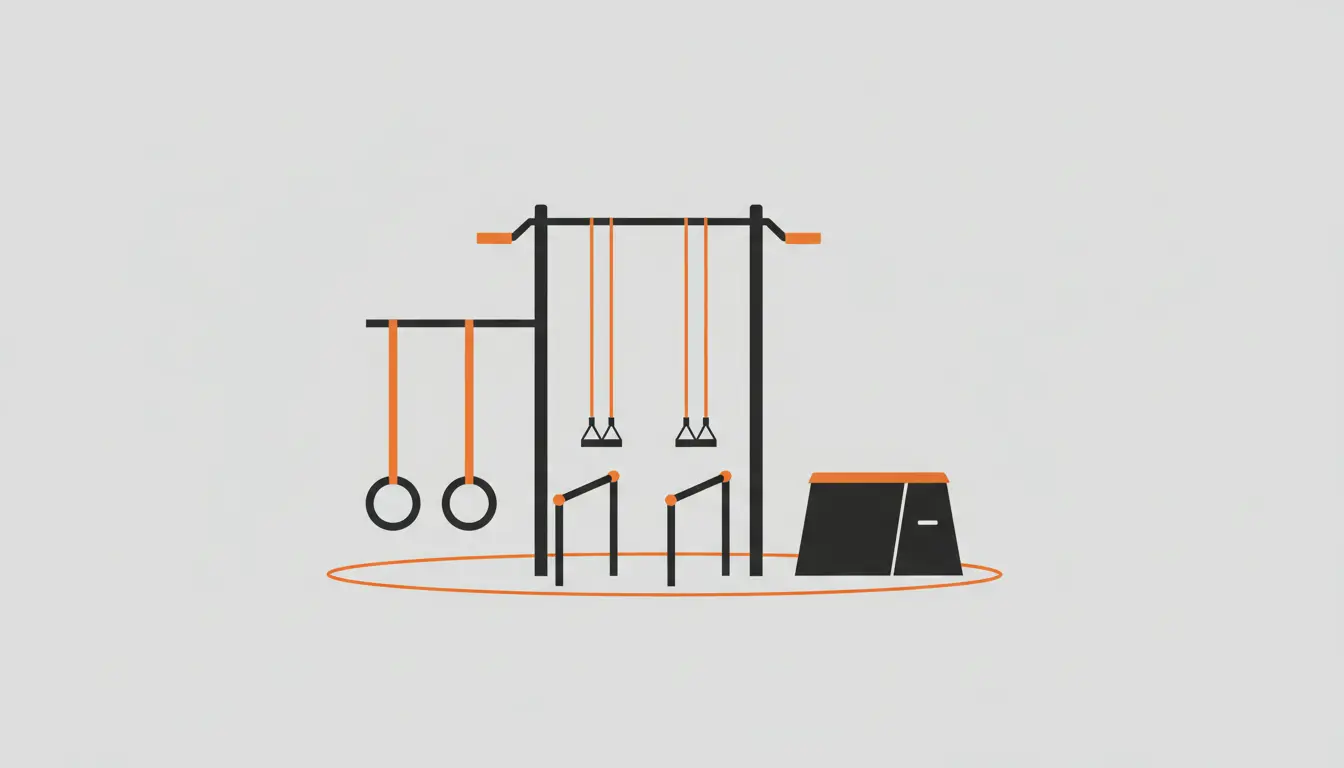
Two calisthenics pieces that are genuinely worth it
I’ll keep this subtle and practical. If you’re building a calisthenics friendly home gym, two items add a lot of training value without taking much space:
- Gornation Gymnastic Rings: they unlock rows, dips, push ups, and skill work while being easy to store. If you’re new to them, this guide helps you set them up and use them well: https://calisthenics-equipment.com/how-to-train-with-gymnastic-rings/.
- Gornation Parallettes: great for wrist friendly push work, L sit practice, and cleaner handstand drills. They also make core training feel more “gym like” even in a small room.
That’s it for product mentions. You can build an excellent gym without more gear, but those two help a lot if calisthenics is part of your plan.
Flooring, noise, and durability (the unsexy stuff that matters)
People love buying equipment and hate thinking about floors. But in my experience, flooring is what makes home training sustainable. It protects your home, reduces noise, and makes lifting feel stable.
Budget friendly flooring that works
If you’re training in a garage or basement, thick rubber mats are hard to beat for value. A simple approach is:
- Lay plywood if you need stability or plan to drop weights
- Add heavy rubber mats on top for grip and noise reduction
- Keep a small clear “platform” zone for your main lifts
If you’re in an apartment, prioritize noise control. Avoid dropping weights and consider training styles that don’t rely on heavy impacts. Rings, bands, and controlled dumbbell work can be surprisingly effective here.
Humidity, rust, and climate comfort
This is where many “ideal homegyms” quietly fail. Moisture ruins gear and makes training unpleasant. If your space gets damp or cold:
- Use a dehumidifier if needed and keep air moving with a fan
- Wipe down metal parts occasionally to reduce rust risk
- Don’t store sweaty straps and bands in sealed boxes
- Improve lighting because it genuinely affects motivation
It doesn’t need to be perfect. It needs to be good enough that you want to walk in and train.
Layout: make your gym flow, not just fit
A good layout saves time and keeps you consistent. If you need to move five things before every session, you’ll train less. I like setting up home gyms in zones, even if the “zones” are just corners.
The three zone setup that works in most homes
- Main strength zone: rack or rings area, plus your heaviest work.
- Accessory zone: dumbbells, bands, bench, smaller tools.
- Conditioning and warm up zone: jump rope space, mobility mat, or a small cardio tool.
This approach keeps sessions smooth: warm up, lift, finish. No chaos.
Storage is training equipment
I’m serious about this. Storage isn’t decoration. It keeps your gym usable. Wall storage, a small shelf, or a pegboard can prevent that classic home gym problem where bands tangle, collars disappear, and dumbbells live in the walkway.
Build routines that match your equipment (not the other way around)
Once your equipment is set, your programming should be simple enough that you can repeat it, track it, and progress. The best home gym is the one that gets used.
A simple weekly structure for beginners and intermediates
If you want a straightforward plan, start with three to four sessions per week and repeat key movements. For example:
- Day A: squat pattern, push, pull, core
- Day B: hinge pattern, push, pull, conditioning finisher
- Optional: skill day for handstands, L sits, and mobility
Keep it boring in a good way. Progress comes from repeating the basics and adding reps, sets, or load over time.
Calisthenics skill work without overcomplicating it
Skills are fun, but they can also become procrastination in disguise. Pick one focus for 6 to 8 weeks. If your goal includes strong core and straight arm control, L sit progressions are a solid choice. This guide breaks it down step by step: https://calisthenics-equipment.com/how-to-train-the-l-sit/.
Common mistakes when building a home gym (and how to avoid them)
You can save a lot of money and frustration by avoiding a few predictable traps. I’ve seen these patterns over and over.
Mistake 1: buying “cool” gear before essentials
Most people need progressive basics first. A stable setup for pushing, pulling, legs, and core beats a fancy specialty item. If you can’t name where the new item fits in your weekly plan, pause the purchase.
Mistake 2: ignoring safety when training alone
Solo training is normal at home. Choose setups that reduce risk: stable stations, controlled loading, and smart exercise selection. If you’re pushing near your limits, make sure your setup has a safe way to fail a rep.
Mistake 3: underestimating space for movement
A rack footprint might fit, but your elbows and plates need space too. Measure the actual training area, not just the equipment base.
Mistake 4: no plan for expansion
Home gyms tend to grow. Plan a small “future zone” for plates, an extra pair of dumbbells, or a new conditioning tool. If you don’t, the gym becomes cluttered and annoying to use.
Example setups that work (small room to garage)
You don’t need to copy anyone’s gym. But examples help you visualize what “ideal” can look like at different budgets and spaces.
Small room setup: minimalist and quiet
This is the setup I like for apartments or spare rooms:
- Adjustable dumbbells
- Rings or a pull up bar depending on mounting options
- Resistance bands
- Bench or sturdy floor pressing space
- Rubber mat for comfort and noise control
It’s compact, versatile, and doesn’t require heavy drops or lots of storage.
Garage setup: versatile strength and calisthenics hybrid
If you have a garage and want a true all around gym, build in phases:
- Flooring and a clear lifting zone
- Rack or sturdy pull up station, plus a bench
- Barbell and plates if strength is a priority
- Rings and bands for calisthenics and accessory work
- Storage so you keep the floor clear
This gives you the ability to train heavy basics while still keeping calisthenics skills in your weekly routine.
Powerlifting focused setup: only what you use
If your ideal homegym is about squat, bench, and deadlift, keep it simple and safe:
- A stable rack or combo solution with safety options
- Barbell you enjoy gripping
- Plates you can expand over time
- Bench that doesn’t wobble
- Platform or mats to protect the floor
Minimal equipment, maximum progression. That’s a good trade.
Veelgestelde vragen
Is it cheaper to build a home gym than a gym membership?
Often, yes, but it depends on what you buy. A focused setup can pay for itself in a couple of years compared to monthly fees. The real savings come when you avoid impulse purchases and build in phases. For How to build your ideal homegym, think “useful basics first,” then upgrade slowly.
What is the best basic equipment to get for my home gym?
For most people, the best basics are adjustable dumbbells, resistance bands, a bench or a comfortable floor setup, and a pull up option. That covers push, pull, legs, and core with minimal space. If barbell strength is your priority, add a rack and plates later once you’re consistent.
How much space do I need to build my ideal homegym?
You can start in a small room around 3 m x 3 m if you choose compact gear and keep storage tidy. A garage space around 150 to 250 sq ft feels much more comfortable, especially with a rack. Whatever your size, leave enough clearance to move safely and train without bumping walls.
Should I buy a power rack, squat stand, or focus on bodyweight training?
Choose based on your main goal. If you train heavy squats and presses alone, a rack with good safety options is usually the smartest. If you’re more into calisthenics, rings and a pull up setup can deliver huge results with less space and cost. Don’t buy a rack just because it looks “serious.”
What are the biggest mistakes people make when learning how to build your ideal homegym?
The big ones are buying too much too early, ignoring flooring and storage, and choosing equipment that doesn’t match their routine. Another common issue is underestimating noise and clearance, especially in apartments. A simple plan and phased buying approach usually beats any “perfect” shopping list.
Your ideal homegym isn’t the one with the most equipment. It’s the one that fits your space, supports your main goal, and stays easy to use on a normal busy day. Start with the movement basics, measure your room honestly, and build in phases so every purchase earns its spot. If you keep your setup simple, safe, and adaptable, you’ll have a training space that grows with you instead of holding you back.


