
Handstands are one of those skills you can practice almost anywhere, but the right equipment can make your progress smoother and your wrists a lot happier. In this guide I’ll break down the best handstand equipment by what it actually helps with: balance feedback, wrist comfort, grip, height, and skill progression. You’ll learn when the floor is enough, when blocks or parallettes are worth it, and when canes are a smart next step. I’ll also share how I decide what to buy and what to skip, so you can build a simple setup that fits your goals and your budget.
What “best” means for handstand equipment
When people search for the best handstand equipment, they often expect a single winner. In practice, the “best” tool depends on what is limiting you right now: wrist comfort, fear of falling, lack of balance feedback, or not having a consistent surface to train on.
My rule of thumb is simple: pick equipment that solves one clear problem, then use it consistently for a few months. Switching tools every week feels productive, but it often just resets your coordination.
The 4 problems equipment should solve
- Wrist stress: reducing painful wrist extension so you can train more often.
- Consistency: giving you the same surface every session, especially outdoors.
- Better balance feedback: making small corrections easier to feel.
- Progression: opening the door to harder variations like presses or one arm work.
A quick safety note that keeps you training longer
Equipment is not a substitute for good habits. If your handstands always feel like a fight, fix your basics first: stacked shoulders, tight midline, and controlled exits. If you need a refresher, this guide is a solid starting point: learn how to do a handstand.
Start with the simplest “equipment”: the right floor setup
The floor is still the best teacher. It gives you the most direct feedback through your fingertips and it forces you to own your line. That said, the “floor” is not just any surface. A squishy mat or soft grass can feel safer, but it usually makes balancing harder because your fingers sink in and your pressure shifts unpredictably.
Hard floor vs soft surface
If you are working on clean holds, a hard, stable surface is your friend. You can actually feel when you are tipping and correct with your fingers. On soft ground, your hands deform the surface and you lose that crisp feedback.
Soft surfaces do have a place. Once your technique is decent, they can be useful for higher volume days, freestanding attempts, and practicing safe bails. Just do not let “comfort” turn into a permanent crutch.
My minimal floor checklist
- Stable surface that does not compress under your palm.
- Enough space to cartwheel out safely.
- A wall nearby for alignment drills, not for leaning.
- Chalk if your hands slip, especially in summer.
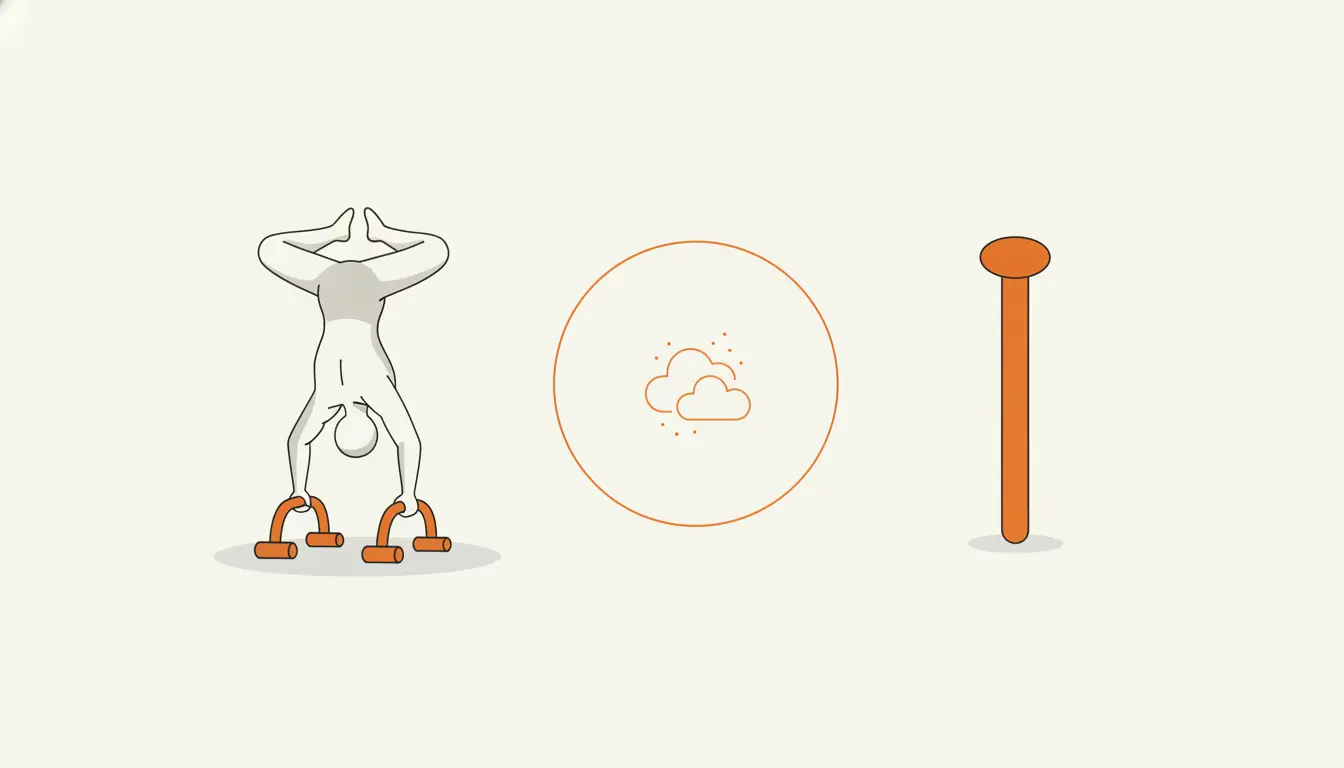
Handstand blocks: the best first upgrade for most people
If I had to pick one tool that helps a lot of athletes without complicating training, it is handstand blocks. They are portable, affordable, and they change wrist loading just enough to give relief while still feeling “handstand specific.”
Why blocks work so well
Blocks shift your wrist angle and give your hand something to grip. That can be a big deal if your wrists get cranky from high volume floor work. They also teach cleaner pressure through the palm. Many athletes instinctively “claw” the floor with their fingers. Blocks make you aware of that pattern quickly.
Another underrated benefit is how blocks prepare you for higher level balance work. When you can hold a calm handstand on blocks, your shoulder position is usually more honest because you cannot compensate as easily with fingertip pressure.
Square blocks vs curved or slanted blocks
Square blocks feel closer to the floor and are great for general training. Curved or slanted blocks reduce wrist extension more, which can be useful when your wrists are sore. I like them as a temporary tool, not a permanent solution, because you still want your wrists to tolerate normal floor handstands over time.
Simple block drills that actually carry over
- Wall line holds: focus on stacking shoulders and ribs without over arching.
- Toe pulls: start on the wall, then gently pull one foot away to find balance.
- Block walks: move one hand from block to floor and back to build shoulder control.
Those block walks are also a nice bridge toward one arm training because they teach you to shift weight without collapsing through the shoulder.
One subtle recommendation
If you want a clean, durable set, the Gornation Handstand Blocks are a smart pick. I like them when someone wants a stable grip surface and a compact tool they can throw in a bag without overthinking it.
Parallettes: the most versatile option for handstands and strength
Parallettes are popular for a reason. They put your wrist in a more neutral position, which often means you can train longer with less discomfort. They also unlock a lot of strength work that supports handstands: pike work, presses, and handstand push up progressions.
When parallettes are the best choice
Parallettes shine if you have wrist sensitivity, if you want to build pushing strength, or if you train in a small space and need a consistent setup. They also help people who struggle to “push tall” through the shoulders, because the grip gives a clear cue to elevate.
Low vs high parallettes
Low parallettes are friendlier for handstands because the fall is small and the setup feels stable. High parallettes can be great for deeper range handstand push ups, but they are less forgiving. If you are unsure, start low and earn the height later.
Parallette drills I keep coming back to
- Box pike holds: teaches shoulder angle and compression for presses.
- Wall facing handstands: great for line without wrecking wrists.
- Negative HSPU: slow lowers build control fast.
- L sit work: extra bonus for core and hip flexors.
If you want to build that core strength in a structured way, this is worth a read: how to train the L sit.
One subtle recommendation
For a simple, reliable setup, Gornation Parallettes are the pair I point most people to. The main reason is practical: stable grip, consistent height, and they work for both handstands and general calisthenics without feeling like a single purpose gadget.
Handstand canes: cool, but only “best” for the right goal
Handstand canes look like a circus trick, but they are also a legitimate training tool. Still, they are not where I send most beginners. Canes add height, change how you balance, and they punish sloppy exits. That is great when you are ready, frustrating when you are not.
Who should use handstand canes
Canes make the most sense if you already own a stable 20 to 30 second freestanding handstand on the floor or parallettes and you want to explore harder balance skills. They can also be useful for one arm handstand pathways because the grip and height change the balance challenge in a way some athletes find easier to “feel.”
What to watch out for
The biggest issue is not strength, it is decision making. If you are still learning to bail safely, canes raise the stakes. Use a clear area, consider a spotter at first, and keep your attempts tidy. A few high quality reps beat twenty sketchy ones.
Handstand boards and unstable tools: fun, but not essential
Boards that rock or wobble can improve proprioception and make training more engaging. They can also be a distraction if your handstand fundamentals are not solid. In my opinion, these boards become “worth it” once you can already hold stable wall facing handstands and you want a new stimulus without increasing wrist volume on the floor.
When a board helps
If you train outdoors on grass or sand, a board gives you a consistent surface, which is a real benefit. It can also reduce that annoying feeling of your fingers sinking in, which makes balancing unnecessarily hard.
When a board becomes a gimmick
If you cannot yet stack shoulders and hips in a basic wall handstand, the board often turns into wobble practice instead of handstand practice. Build the line first, then add instability as a spice, not as the main course.
How to choose the best handstand equipment for your level
If you feel stuck, do not buy more stuff. Use this simple matching approach: pick the tool that removes the biggest bottleneck, then train the same key drills for at least 6 to 8 weeks.
Beginner
Your best “equipment” is a wall, a hard floor, and a plan. Add blocks if your wrists complain or if you want better grip feedback. Keep it simple and focus on alignment, shoulder elevation, and controlled exits.
Intermediate
This is where parallettes or blocks can really help you increase training volume while keeping wrists happy. If your goal includes handstand push ups, parallettes are usually the most direct path. For technique heavy sessions, blocks are great.
Advanced
If you are chasing presses, one arm progressions, or performance style handstands, you can consider canes or more specialized tools. Just be honest: the tool should serve a clear skill goal, not just look impressive in your training corner.
Buying checklist: what matters more than the brand
Most handstand equipment is simple by design. That is good news, because it means you can judge it with a practical checklist instead of marketing claims.
What to look for
- Stability: no wobble, no slipping, no weird flex.
- Grip surface: enough friction without tearing your skin.
- Edges and finish: rounded where it matters, no splinters, no sharp corners.
- Size: blocks should fit your hand; parallettes should match your shoulder width comfort.
- Portability: if it is annoying to set up, you will not use it.
What I would skip for most people
I would skip ultra unstable surfaces early on. They can be fun, but they often turn training into “survive and shake” instead of building a repeatable line. I would also skip buying a full bundle on day one. Earn your upgrades as your training needs become obvious.
Programming tip: how to use equipment without losing your basics
A common mistake is to move all training to the new tool because it feels novel. You get a short motivation boost, then your floor handstand suddenly feels worse. The fix is simple: keep a little bit of floor work in your week.
A simple weekly split (example)
- Technique day: floor or blocks, wall facing holds, toe pulls, clean exits.
- Strength day: parallettes, pike holds, negative HSPU, shoulder taps if controlled.
- Play day: your optional tool, small volume, high focus, stop before form drops.
If handstand push ups are one of your goals, this progression guide pairs well with the strength day: how to do handstand push ups.
Veelgestelde vragen
What is the best handstand equipment for beginners?
For most beginners, the best handstand equipment is actually a hard floor, a wall, and optionally a simple set of blocks. Blocks can reduce wrist stress and give clearer grip feedback, without changing the movement too much. Start with clean wall facing holds and controlled exits before chasing advanced tools.
Are handstand blocks better than parallettes?
Neither is universally better. Blocks feel closer to floor handstands and are great for technique and wrist variation. Parallettes put the wrist in a more neutral position and are usually better for building pushing strength and handstand push up progressions. Choose based on your main bottleneck right now.
Do handstand canes help you learn a one arm handstand faster?
They can, but only if you already have a solid freestanding handstand and good shoulder control. Canes change the balance challenge and give a clear grip, which some athletes find easier for one arm pathways. If your basics are shaky, canes often just add fear and messy attempts.
Is a handstand board worth it for balance?
A board can be worth it when you want extra balance feedback or you train on soft ground and need a consistent surface. If you are still learning alignment, a board may distract you from the fundamentals. Treat it as a secondary tool for intermediate to advanced training, not a shortcut.
How much handstand equipment do I really need?
You can get very far with no equipment at all. If you want one upgrade, pick either blocks or parallettes based on wrist comfort and goals. More tools only help if they solve a specific problem, fit your space, and you will actually use them consistently for months.
The best handstand equipment is the tool that removes your biggest limiter without adding complexity. For most athletes, blocks and parallettes cover almost everything: technique work, wrist friendly volume, and strength progressions. Canes and boards can be great later, but they are optional and only make sense when you have a clear goal for them. If you keep one principle in mind, make it this: master the basics on a stable surface, then use equipment as a targeted upgrade, not as a distraction.


