
The L sit looks simple until you try to lift your heels and nothing happens. If that sounds familiar, you are not alone. The good news is that the L sit is very trainable when you stop chasing the final shape and start building the pieces: shoulder pressure, core tension, hip strength, and enough hamstring room to straighten your legs.
In this guide I will show you the exact progressions I use with beginners and intermediates, how to program them into your week, what to do when you get stuck, and how to choose a setup that feels good on your wrists. By the end you will have a clear plan for your next session.
What the L sit really is (and why most people fail the first try)
The real goal: strong pressure plus compression
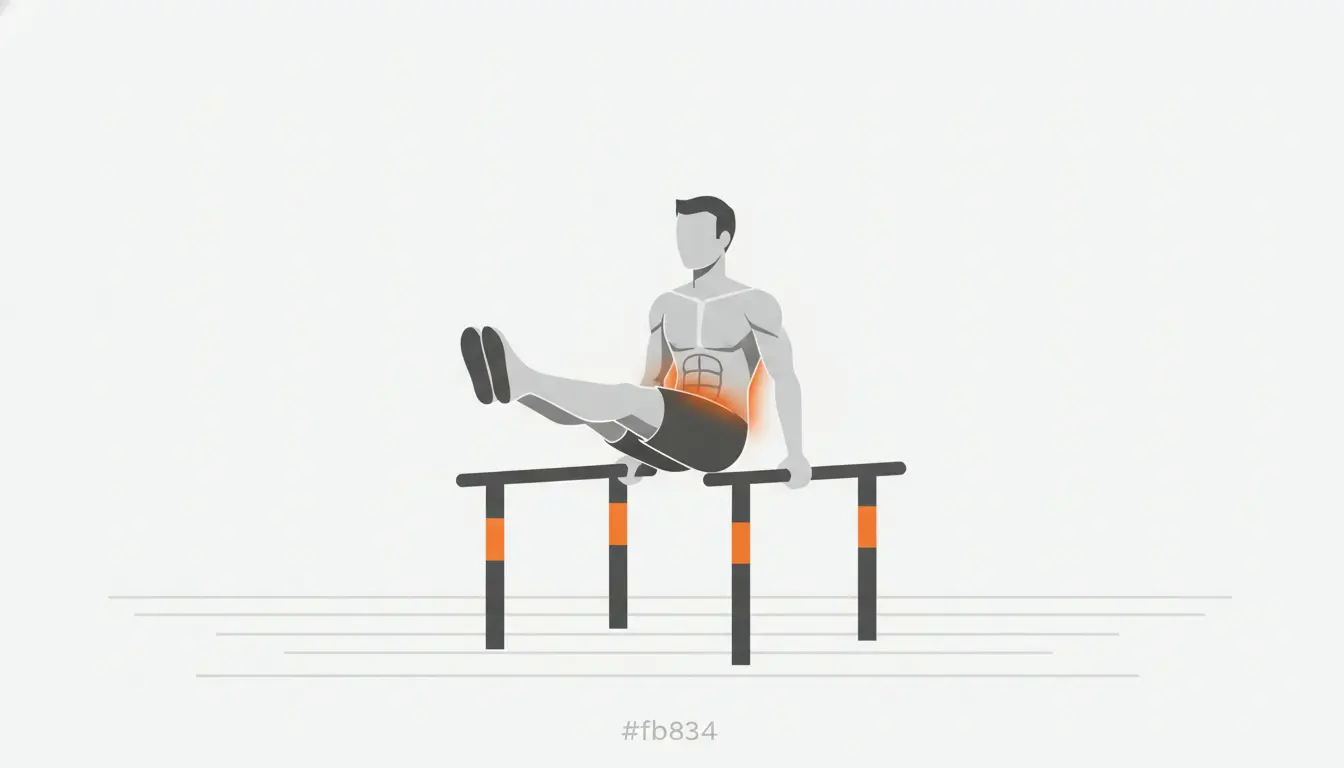
An L sit is not just raising your legs. It is a full body isometric where you combine two actions at the same time: you press your hands down hard and you pull your legs up hard. If either side is missing, you either stay glued to the floor or you tip forward and collapse.
The simplest cue that fixes a lot is this: push the floor away and lift your chest. When your shoulders drop toward your ears, your leverage disappears. When your chest caves, your hips sink and your legs feel twice as heavy.
Muscles involved: more than abs
You will feel your abs immediately, but the L sit is also a serious shoulder and back exercise. Your lats help depress your shoulders, your triceps keep the arms locked, and your hip flexors do the heavy lifting to keep the legs up. On top of that, your quads and inner thighs create the “straight, tight legs” look that makes the hold efficient.
This matters because if you only train “core”, you often get stuck. A better approach is to treat the L sit as a skill that requires coordinated tension everywhere.
Quick self check: are you ready to start?
Minimum prerequisites
You do not need a perfect plank or a strict dip to begin, but you should be able to hold yourself with straight arms and stable shoulders for a few seconds. If your elbows always bend or your shoulders shrug, start one step earlier and build the base.
Wrist tolerance: you can support your weight on flat hands without sharp pain
Shoulder control: you can actively push your shoulders down away from your ears
Basic bracing: you can hold a hollow body or boat shape without your lower back popping up
Hamstring “enough”: you can sit tall with legs fairly straight, even if not perfect
If you are missing one of these
That is normal. It just tells you where to focus. If the wrists complain, change the setup. If the shoulders shrug, spend more time on support holds. If the legs feel impossible to lift, you need more compression strength and smarter progressions, not more willpower.
If you want a solid warm up structure before practice, this guide fits perfectly with L sit days: how to warm up for calisthenics training.
Setup and form cues that instantly make the L sit easier
Hand position and shoulder position
Place your hands next to your hips, not behind you. Fingers can point forward or slightly out, whichever feels kinder on your wrists. Then do the key action: press down and depress your shoulders. Think “long neck” rather than shrugging.
Your hips should stay directly under your shoulders. If you lean forward to “cheat” the lift, you usually lose the hold faster and you train the wrong pattern.
Leg tension: straight does not mean relaxed
Whether your legs are bent or straight, keep them active. Lock the knees as much as you can, squeeze the quads, and point the toes. Oddly enough, tight legs make the hold feel lighter because your body becomes one rigid unit instead of a wobbly chain.
Breathing without losing tension
Many people treat the L sit like a breath holding contest. Instead, keep short, calm breaths. I like a slow exhale as I lift, then small sips of air while holding. If you cannot breathe at all, your tension is probably in the wrong place, usually in the neck and hands.
The L sit progression plan (step by step)
This is the progression ladder I recommend. Stay at the hardest step you can do with clean form, then build time there before moving on. A good rule is: when you can accumulate about 45 to 60 seconds total at a step across your sets, you are ready to try the next one.
Step 1: Hollow body or boat hold (foundation)
If your core cannot stay braced, your L sit will always look like a struggle. Hollow and boat holds teach the bracing you need without asking your shoulders to carry you yet.
Hold 15 to 30 seconds
Keep lower back gently pressed toward the floor in hollow
In boat, sit tall and keep the chest up
Keep it simple: 3 sets, 2 to 3 times per week, done after your warm up.
Step 2: Seated press with both feet on the floor
Sit with legs in front, heels on the ground. Hands next to hips. Now practice the “pressing” part without needing lift off. Push down hard, shoulders away from ears, chest tall, hips under shoulders. You should feel your lats and triceps immediately.
Hold 10 to 20 seconds for 3 to 5 sets. This is boring, but it builds the exact pattern that most people skip.
Step 3: Alternating single foot lifts
Same setup, but lift one foot a few centimeters. Keep the knee angle steady and do not lean forward. This shifts more load into your arms while introducing leg lift strength.
Do 5 to 10 second holds each side
Focus on shoulders down and quiet torso
If you tip forward, reduce the height of the lift
Step 4: Tuck L sit (first real lift off)
From the same position, pull both knees toward your chest and lift your feet together. If you cannot lift both at once, start on your toes and lift one leg at a time until you can float into a full tuck.
In a good tuck, your hips are off the ground, your arms are straight, and your shoulders are actively depressed. Start with 5 to 10 second holds. Build quality first, then time.
Step 5: Partial leg extension (slow lever length)
From the tuck, extend one leg a little, then bring it back. The main goal is not the leg position, it is keeping the torso and shoulders unchanged while the lever gets longer.
A practical approach is to “own an angle”. Extend to the point that feels hardest, then back off just slightly and hold there for 5 to 10 seconds. That is your productive range right now.
Step 6: One leg L sit (single leg extension)
Extend one leg fully while the other stays tucked. Hold each side for 5 to 10 seconds. This step teaches balance under uneven load, which is exactly what you will need when you move to two straight legs.
Do not rush this. In my experience, people who skip the one leg stage often end up with a crooked full L sit later.
Step 7: Full L sit
Now extend both legs together, toes pointed, knees locked as best you can. Think about lifting the legs from the hips, not from the knees. Your hips should stay elevated and your chest should stay proud without over arching.
Start with short holds, even 3 to 5 seconds. Repeat more often instead of grinding one ugly max hold. Clean seconds are what build the skill.
Where to train: floor vs parallettes vs rings
Floor: simple and honest
The floor is the most accessible option and it forces you to earn the position. The downside is wrist extension and limited clearance. If your legs scrape the ground, it becomes hard to feel progress.
Parallettes: the most beginner friendly upgrade
Parallettes give you extra height, which solves the “my legs cannot clear the floor” problem and often reduces wrist discomfort because your wrist stays more neutral. If you want one piece of gear that makes L sit practice smoother, Gornation parallettes are a solid, no nonsense choice. I like them because they do one job well: stable grip, predictable height, and they fit into a minimal home setup.
Rings: great, but more demanding
Rings add instability, so you need more shoulder control. They are fantastic once you have a decent tuck and support hold, but they can slow beginners down because the shake steals attention from the core work.
Programming: how often, how long, and where in your workout
The simple weekly plan (works for most people)
You do not need daily practice. For most beginners and intermediates, 2 to 4 sessions per week is enough progress with enough recovery.
Pick 1 to 2 progressions per session
Do 3 to 5 work sets
Hold 5 to 30 seconds depending on the step
Rest 60 to 90 seconds between sets
Place L sit practice early in the session, right after your warm up, while your shoulders and core are fresh.
How to progress without guessing
Progress one variable at a time. Either add seconds to your holds, add a set, or move to a harder progression. If you change everything at once, you cannot tell what worked and your form usually degrades.
A method I use a lot is density. Keep the same total time target, for example 40 seconds at tuck, but try to reach it in fewer sets over a few weeks. When that becomes easy, move on.
How to combine with strength training
L sit work pairs well with pushing and pulling days because it is mostly isometric. If you do dips, push ups, rows, or pull ups, L sits fit nicely as a skill block. If you are building your push capacity, this guide can help you keep the rest of your training moving while you practice holds: how to increase your push up numbers.
Getting unstuck: the most common bottlenecks (and fixes)
Problem 1: “I am not flexible enough”
Tight hamstrings make a straight leg L sit harder, but they do not block progress. Train the best leg line you have today and do a few minutes of hamstring work after. What I do not like is waiting for perfect flexibility before you start. That just delays shoulder and hip strength, which you need anyway.
Two practical tactics:
Use the one leg L sit longer, and slowly straighten the second leg over weeks
Try a straddle variation temporarily if straight legs are the only thing stopping you
Problem 2: “My arms are too short, I cannot lift”
This usually means you cannot create enough downward pressure yet. Elevation helps, but the real fix is stronger shoulder depression and better timing. Parallettes give you room to press and to feel the correct shoulder position. On the floor, think about driving your hands through the ground, then lifting your hips first and legs second.
Problem 3: shoulders shrug up
If your shoulders creep up, you leak strength. Go back to seated presses and support holds. Film yourself from the side. The goal is a clean “long neck” position. I would rather see a smaller tuck with perfect shoulders than a messy higher progression.
Problem 4: bent arms
Bent elbows turn the L sit into a triceps fatigue drill and often irritate the shoulders. Reduce the difficulty until you can keep straight arms. Add extra support hold time. Even 3 sets of 10 seconds, done consistently, makes a big difference.
Problem 5: cramps in hip flexors or quads
Cramping is common when the hip flexors finally have to work hard. Keep your sets short, warm up the hips, and build volume gradually. Pointing your toes and keeping the legs tight often reduces cramping because the tension is distributed more evenly.
Technique clean up: mistakes I see all the time
Dropped shoulders
If your shoulders rise toward your ears, you lose height and stability. Fix it by actively pressing down and imagining you are trying to put your shoulders into your back pockets. You should feel your lats turn on.
Rounded, collapsed posture
A rounded back usually comes from losing brace. Lift your chest, keep ribs down, and stay tall. You are aiming for braced, not hunched.
Loose legs
Loose legs wobble, and wobble costs energy. Squeeze the quads, lock the knees as much as possible, and point the toes. This is one of those simple cues that instantly makes holds longer.
Over gripping
If your hands are death gripping, you waste energy. Use a firm grip, but focus on pressing down instead of squeezing harder. If sweaty hands are limiting you, Gornation liquid chalk is a practical option because it improves friction without turning your floor setup into a mess.
Advanced options once you have a solid L sit
Straddle L sit and V sit prep
Straddle shifts the load and asks more from the hips. It can also be a smart bridge if straight legs are still your limiter. From there you can start lifting higher toward a V sit, but only if your shoulders stay depressed and your posture stays tall.
Add movement without losing control
Once a static hold feels stable, small controlled reps build even more usable strength. Two ideas:
Tuck L sit hold, extend one leg, return, switch sides
L sit leg lifts: lift a few centimeters and lower slowly while staying rigid
If your long term goal includes skills like the press to handstand, you will benefit from building straight arm strength and compression. This handstand guide is a good next read when you are ready: learn how to do a handstand.
Veelgestelde vragen
How to train the L-sit if I cannot lift both legs yet?
Start with the smallest version that still forces good form: seated presses, single foot lifts, and tuck holds. Build total time under tension, not heroic max attempts. If you can hold a clean tuck for multiple short sets, you are already training the exact pattern that leads to the full position.
How to train the L-sit for straight legs when my hamstrings are tight?
Do not wait for perfect flexibility. Keep practicing the best leg line you have, then add a few minutes of hamstring work after training. Use one leg L sits and partial extensions to gradually lengthen the lever. Over time your active flexibility improves because you are getting stronger in that range.
How often should I practice when learning how to train the L-sit?
Two to four sessions per week is enough for most people. Keep the practice short and crisp, usually 10 to 15 minutes. Put it early in your workout, right after warming up, so your shoulders and core are fresh. Consistency beats exhausting sessions that wreck your form.
Is it better to train the L-sit on the floor or on parallettes?
Both work. The floor is simple and teaches honesty, but it can be tough on wrists and gives less clearance. Parallettes often make learning faster because you can press down harder and your legs have more room to lift. If your wrists or clearance are limiting you, parallettes are the smarter choice.
How long should I be able to hold an L-sit before moving to harder variations?
A good benchmark is 10 to 20 clean seconds for a standard L sit before you chase harder progressions like V sit work or L sit to handstand drills. You can also use total volume: when you can accumulate 60 seconds of quality holds in a session, you have enough base strength to progress safely.
If you want the fastest path to a clean L sit, stop treating it like a single exercise and start treating it like a skill built from parts. Pressing strength in the shoulders, strong bracing, and hip compression all matter, and the progressions let you train each piece without guessing.
Pick the hardest step you can do with good form, practice it 2 to 4 times per week, and build total quality time under tension. Stay patient with the one leg and partial extension stages, because they are where control is built. Do that, and the full L sit stops being a magic trick and becomes a predictable result of consistent training.


