
Burpees look simple on paper, but the first time you try them, they can feel like chaos. The good news is that once you learn the sequence and a few key form cues, burpees become one of the most effective no equipment moves you can do anywhere. In this guide, I will show you how to do burpees step by step, how to scale them for your level, and how to avoid the most common mistakes that wreck your wrists, lower back, or pace. You will also get practical set and rep ideas you can use today.
What a burpee actually is and why it works
Full body training in one tight sequence
A burpee takes you from standing to the floor and back up again. That sounds basic, but it hits a lot at once: a squat pattern, a plank, a push up, and a jump. You will feel your legs, core, chest, shoulders, and lungs working together. I like burpees because they are honest: if your technique slips, you know immediately.
What you need
You can do burpees with zero equipment and very little space. If you train on a slippery floor or your hands get irritated, a mat can help, but it is optional. If wrist comfort is your limiting factor, I would rather improve your setup and use a simple support than force painful reps.
How to do burpees step by step
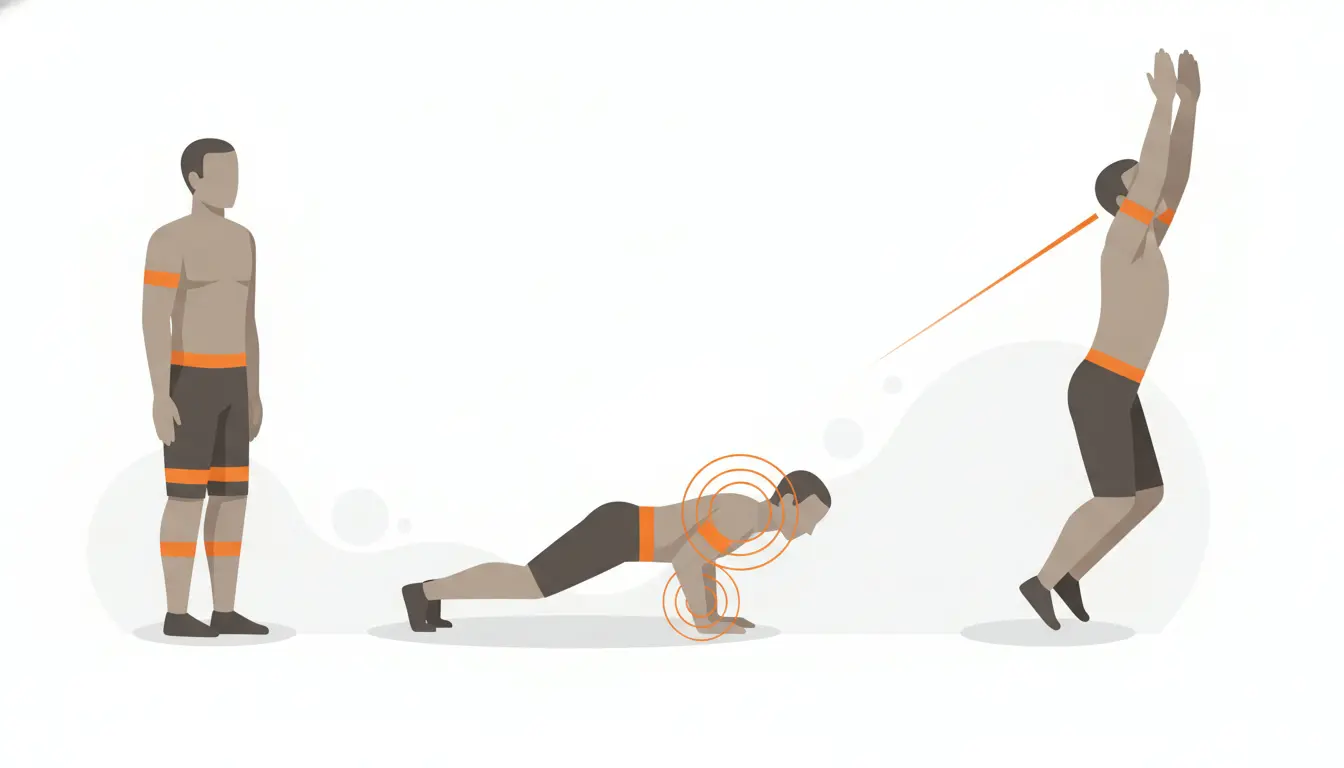
The clean 7 step version
- Stand tall with feet about hip to shoulder width, ribs down, eyes forward.
- Squat down and place hands on the floor just in front of your feet. Keep your feet flat if you can.
- Jump or step back into a strong high plank. Shoulders stacked over wrists, body in a straight line.
- Lower under control like the start of a push up, elbows roughly 45 degrees from your body.
- Press back up to plank without sagging your hips.
- Jump or step forward to a low squat, landing softly.
- Jump up with arms overhead, then land quietly and repeat.
Two form cues that fix most problems
- Stack your joints: wrists under shoulders in plank. It feels more stable and saves your wrists.
- Brace your core: think of keeping your belt line level so your lower back does not dip.
- Land softly: quiet feet usually means good control and better pacing.
Common mistakes (and quick fixes)
Wrist pain, low back sag, and sloppy landings
Most ugly burpees come from rushing the transitions. If your wrists ache, check that your hands are not too far forward and that you are not collapsing into your shoulders. If your lower back feels compressed, you are probably letting your hips drop in the plank or during the push up.
- Hands too far forward: bring them closer so shoulders sit over wrists.
- Elbows flare out: aim for about 45 degrees to reduce shoulder stress.
- Feet slam forward: step in or jump shorter, then stand before the final jump.
Variations and progressions for every level
Beginner friendly options
If you are learning how to do burpees, your goal is smooth reps, not suffering. Start with a version you can repeat with consistent form.
- Step back burpee: step to plank and step back in, no jumping.
- No push up burpee: hold a solid plank, then return to squat.
- No jump finish: stand tall instead of jumping, especially if you are fatigued.
Intermediate upgrades
Once your base rep looks the same from start to finish, add intensity by adding speed while keeping control, or by adding a small challenge inside the plank.
- Add a strict push up every rep.
- Add a small vertical jump with a soft landing.
- Add 2 to 4 mountain climbers in the plank, then continue.
Reps, sets, and how to program burpees
Simple, effective formats
Burpees are intense, so keep sets short and repeatable. For most people, 30 to 90 seconds is plenty. I prefer consistent pace over all out sprinting because technique holds up and recovery is easier.
- Technique practice: 5 sets of 3 to 5 clean reps, resting as needed.
- Conditioning: 6 to 10 rounds of 30 seconds on, 30 to 60 seconds off.
- Finisher: 20 total reps, broken into small sets with perfect form.
When small equipment actually helps
Two pieces are genuinely useful for burpees. If your wrists complain, a pair of Gornation parallettes can keep your wrists in a more neutral position and make the plank and push up feel cleaner. If grip and hand comfort are the issue, a simple pair of Gornation gloves can be worth considering. For a broader overview, see these calisthenics gloves.
Veelgestelde vragen
How to do burpees if I cannot do a push up yet?
Remove the push up and focus on a strong plank. Step back to plank, hold one second with a tight core, then step forward and stand or jump. In parallel, build your push up with short sets of controlled reps. When you can do 5 clean push ups, add them back into the burpee.
How to do burpees without hurting my wrists?
Start by stacking shoulders over wrists in the plank and spreading your fingers for a stable base. Avoid letting your chest drop first. If the floor angle still bothers you, use handles such as Gornation parallettes so your wrist stays more neutral. Reduce speed until every transition feels controlled.
How many burpees should a beginner do?
Pick a number that lets you keep form. A good start is 5 sets of 3 to 5 reps with full rest, or 6 rounds of 20 seconds work and 40 seconds rest. Progress by adding a rep per set or extending the work time slightly, not by jumping straight to huge totals.
Are burpees better for cardio or strength?
They are mainly a conditioning tool that also builds useful bodyweight strength. Your heart rate rises fast, but you are still doing real work for legs, chest, shoulders, and core stability. If you want more strength, slow the push up and keep reps low. If you want more cardio, shorten rest.
How to do burpees faster without getting sloppy?
Speed comes from cleaner positions, not from flailing. Practice smooth hand placement, a tight plank, and a quiet landing. Use a steady rhythm where you can still breathe through the rep. I often tell people to earn speed by doing 10 perfect burpees in a row before trying to race the clock.
Learning how to do burpees is mostly about control: stack your plank, brace your core, and land softly. Start with a scaled version you can repeat, then build intensity by adding the push up, the jump, and eventually pace. If your wrists or hands limit you, a small tweak in setup or simple support can make burpees feel far more sustainable. Keep reps clean, keep sets short, and you will get the conditioning benefit without turning every session into a grind.


